
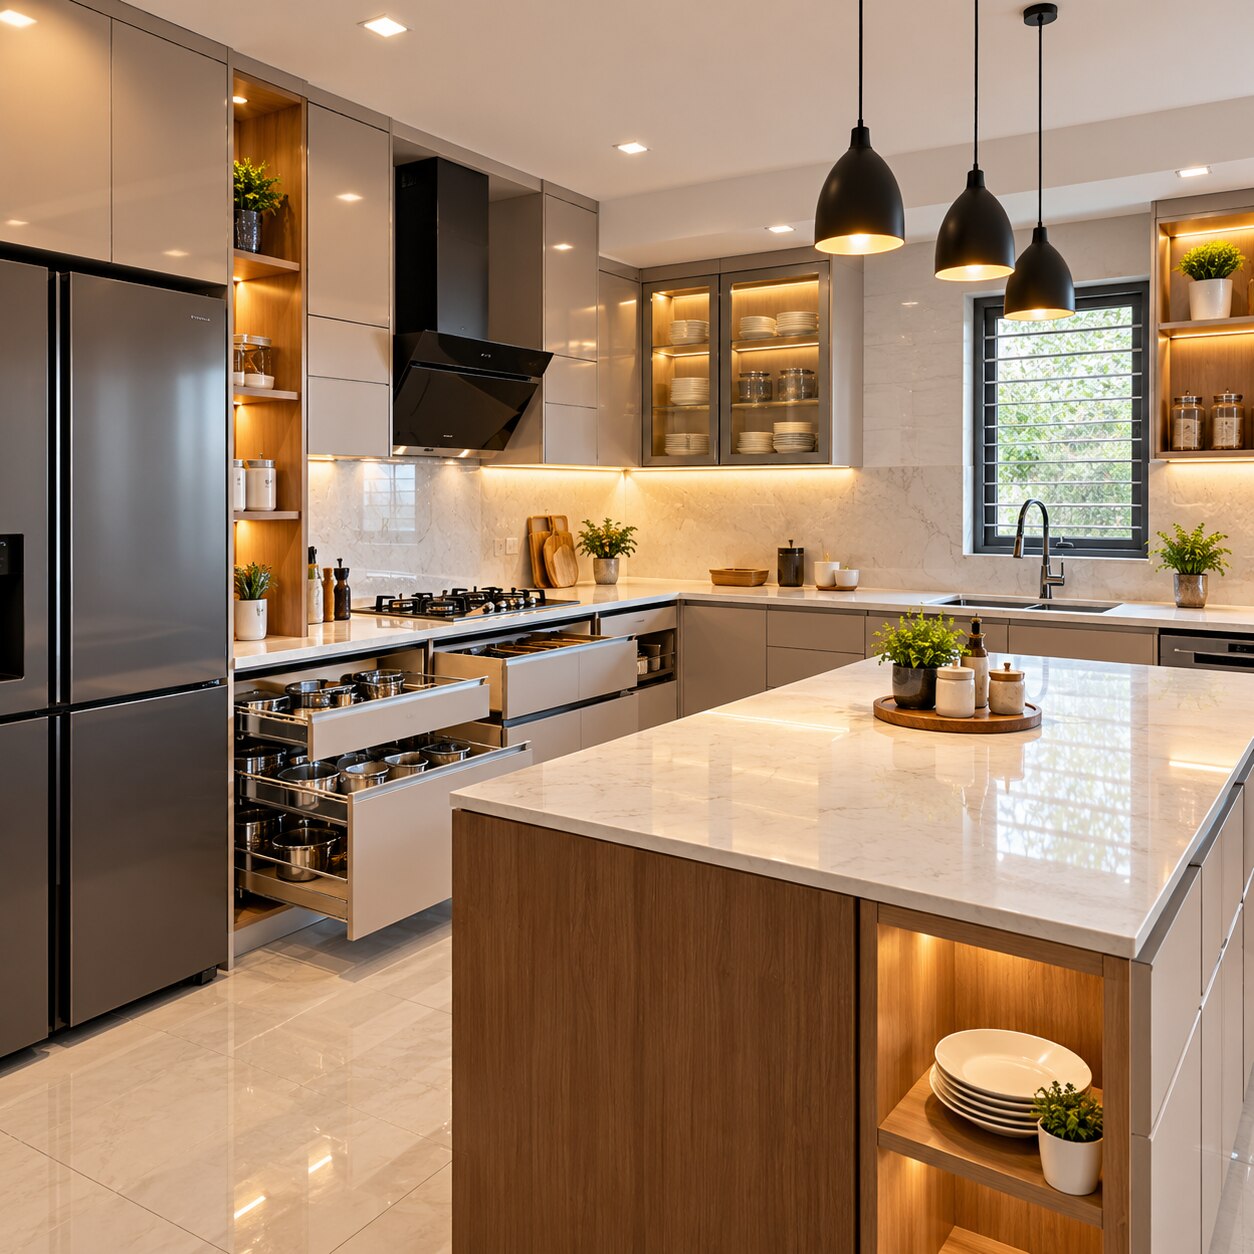
A kitchen can contain many cabinets and still waste space if doors collide, corners become unreachable, or preparation surfaces sit far from the sink and hob. By mapping your cooking habits, appliances, storage inventory and room constraints, you can test whether a proposed design will reduce steps, keep counters clearer and make more of the available floor area.
Key takeaways
- Plan refrigerator, sink, preparation, hob and waste zones around your cooking sequence.
- Use drawers, pull-outs and adjustable shelves to make cabinet volume accessible.
- Check appliance clearances, service routes and door swings before fixing the layout.
- Choose surfaces and hardware based on users, cleaning demands and maintenance access.
Start with the Work Pattern: Zones, Sequences and Clearances
Connect the refrigerator, preparation counter, hob, sink and waste bin in the order you use them, not merely as points on a drawing. The kitchen work triangle remains useful for a single cook, but islands, multiple cooks and separate appliances make kitchen workflow zones more reliable. Plan each zone around its next movement.
- Food storage zone: Place the refrigerator and dry-goods storage near the entry, with clear access that does not cut through the cooking area.
- Preparation zone: Keep the main worktop between storage and hob. Put knives, boards and mixing tools within reach, with landing space near the sink and hob.
- Cooking zone: Position the hob beside the preparation surface, not at the end of an aisle. Leave about 12 inches of counter on one side and 15 inches on the other for hot pans.
- Cleaning zone: Keep the sink, waste bin and dishwasher close together. Check the dishwasher door open; it must not block the aisle, a drawer or the refrigerator.
- Serving zone: Place plates and serving dishes between the cleaning zone and dining area, so finished food does not cross the preparation path.
Allow about 24 inches of counter on one side of the sink and 18 inches on the other. Check the working aisle with cabinet doors, drawers and the island in use; extra island storage is a poor trade if it creates a bottleneck.
A nearby pull-out or island worktop can replace missing landing space only when it remains within one easy step.
Turn Cabinet Volume into Usable Storage
Measure clear internal width, depth and height, not the number of cabinet fronts. A deep shelf can hold more on paper while hiding items at the back; full-extension drawers let you see, reach and return contents from above.
| Storage choice | Useful dimensions or mechanism | Best use and trade-off |
|---|---|---|
| Full-height pantry units | Adjustable shelves about 250–350 mm deep, or pull-out frames | Grain bins and dry goods stay visible; pull-outs improve access but reduce net width and add hardware. |
| Drawer stacks | Shallow 150–200 mm drawers, medium 250–350 mm, deep 400–500 mm | Shallow drawers suit spices and utensils; deep drawers hold pots, plates and small appliances without kneeling. |
| Tandem drawers | A narrow upper drawer sits inside a deeper front | Uses one front for two storage levels; check that the inner drawer clears hinges and handles. |
| Corner carousels | Rotating shelves with a firm stop and weight rating | Recovers corner storage, but leaves dead zones and needs maintenance. |
| Blind corners | Use a swing-out fitting only after checking cabinet width and door clearance | It can retrieve rear items; an unused corner may work better than a costly, cramped mechanism. |
Keep everyday dishes near the dishwasher, preparation tools beside the main counter, and heavy cookware in lower drawers. Record plumbing, fillers and appliance housings on the interior schedule; they consume volume without storing anything. Protect deep drawers from overloading, or runners will drag and fronts can collide with adjacent doors.
Fit the Layout to the Room, Appliances and Building Services
A layout earns its footprint by keeping work surface beside each appliance and leaving an unobstructed aisle. Measure the open refrigerator door, dishwasher door clearance and handle projection, not just the closed appliance footprint; then check whether drawers still open and two people can pass.
| Layout | Difficult-area solution | Access and work-surface check |
|---|---|---|
| L-shaped kitchen | Run cabinets along two walls, stopping around windows; use a corner for storage rather than blocking it with a structural column. | Keep the sink, hob and preparation counter on adjacent runs, with at least 42 inches of aisle width where two people work. |
| U-shaped kitchen | Use the third wall for tall storage or a refrigerator, but avoid trapping the cook in a tight base. Uneven walls can take scribed fillers. | Keep opposing counters from creating a pinch point; a counter depth near 24 inches preserves usable work area. |
| parallel kitchen | Place cooking and cleaning on opposite runs, routing plumbing points and gas lines along the shorter service path. | Test the dishwasher door clearance and refrigerator door swing together; narrow aisles become unusable when either door opens. |
| straight-line kitchen | Put storage, preparation, cooking and cleaning in one run, adding a nearby pull-out worktop where counter is short. | Use shallow cabinets near windows or electrical outlets instead of sacrificing landing space. |
| open-plan kitchen layout | Use an island and peninsula to separate kitchen activity from seating without enclosing the room. | Keep appliance doors away from the main walkway and place outlets where small appliances will not trail cables. |
Treat columns, windows and service routes as fixed constraints before choosing cabinet fronts. Relocating plumbing points, gas lines or electrical outlets can cost more than changing cabinet positions, while a poor aisle width cannot be repaired with storage hardware.
Choose Materials and Features Around Real Users and Maintenance
Choose cabinet construction by exposure and repairability, not appearance alone. Plywood resists screw pull-out and moisture better than particleboard, but costs more; sealed particleboard works for dry areas when its edges stay intact. Specify edge banding on every exposed panel, then compare laminate and acrylic finishes for scratch visibility, cleaning effort and replacement cost.
| Option | Strength | Trade-off | Best fit |
|---|---|---|---|
| Plywood versus particleboard | Plywood offers better moisture resistance and repairability | Higher material cost; particleboard swells after leaks | Plywood near sinks; sealed particleboard in dry storage |
| Laminate and acrylic finishes | Laminate hides wear and cleans easily; acrylic gives a glossy, seamless look | Acrylic shows fingerprints and scratches; both need proper edge banding | Choose laminate for heavy cooking and tighter budgets |
| Deep drawers versus shelves | Drawers reveal contents and suit heavy pots | They need rated runners and reduce vertical storage | Use drawer load ratings for cookware; shelves for light plates |
| Open shelving versus closed cabinets | Open shelves provide quick access | They collect grease and dust | Use closed cabinets for infrequently cleaned items |
Pay for soft-close hardware only where noise and finger safety matter, and check its drawer load ratings. An appliance garage, lift-up units, pull-out bottle rack, under-sink organiser and toe-kick drawer add access but also hinges, runners and failure points.
Keep lighting inside dark cabinets, provide ventilation around appliances, and place the chimney where its duct route works.
For wheelchair use or aging in place, include accessible work surfaces with a maximum 34-inch work surface and a 60-inch turning space; lower counters also suit shorter cooks. Confirm handle reach, seated knee clearance and maintenance access before sacrificing cabinet capacity.
Test the Plan and Compare the Right Delivery Option
Choose professional kitchen interior design, carpenter-built cabinetry, ready-made units or a DIY layout by testing measurable outcomes, not attractive cabinet fronts. Provide a storage inventory, appliance specifications, site measurement, and a dimensioned floor plan with cabinet elevations. Confirm clear shelf and drawer dimensions, aisle widths, dishwasher open-door clearance, and obstruction zones.
Request these deliverables before approving the plan:
- 3D views, shop drawings, a material schedule, and a hardware schedule
- Electrical and plumbing layouts showing civil and electrical coordination
- A quotation listing exclusions, installation warranty, installation access, cleaning, maintenance, repairability, and snag inspection
- A disruption plan covering temporary kitchens and protection of occupied rooms
| Option | Best fit | Check before choosing |
|---|---|---|
| Professional design | Irregular rooms, complex services, or full coordination | Nagpur heat, dust, humidity, site access, and local appliance availability |
| Carpenter-built | Custom sizes, low budgets, or unusual storage | Shop drawings, finish samples, hardware quality, repairability, and timeline |
| Ready-made units | Standard rooms and limited renovation access | Exact module sizes, fillers, appliance fit, delivery damage, and installation access |
| DIY layout | Rental homes, temporary kitchens, or simple straight runs | Safe clearances, electrical load, plumbing route, and realistic storage capacity |
A professional kitchen plan earns its fee when it prevents rework; a carpenter option fails when measurements remain verbal. Empower Infra can be assessed by the same evidence: drawings, coordinated layouts, exclusions, and a documented snag process. Compare usable storage, preparation surface, movement, disruption, and maintenance after installation—not cabinet count.
Related product
 | Services Modular Kitchen Designing At the heart of every home, our kitchens receive special attention through our dedicated interior designing services. |
Frequently asked questions
How should kitchen zones be arranged for efficient workflow?
Arrange the refrigerator, preparation counter, sink, hob and waste bin in the order you use them. Plan each zone around its next movement, and add clearances for cabinet doors, appliances and people. The work triangle suits a single cook, while workflow zones suit islands and multiple cooks.
How can kitchen cabinets provide more usable storage?
Prioritise accessible storage over nominal cabinet volume. Use drawers for cookware and provisions, pull-outs for narrow gaps, adjustable shelves for changing items, and internal organisers that keep contents visible and reachable.
What should you check before choosing a kitchen layout?
Measure the room, appliance dimensions, door swings, window positions and service points. Confirm clearances around the sink, hob, refrigerator, island and walkways before finalising cabinet locations.
Which kitchen materials and features are easiest to maintain?
Match worktops, cabinet finishes, sinks, handles and hardware to the users and cleaning routine. Select durable, wipeable surfaces, avoid inaccessible joints, and leave access to plumbing, waste connections and appliance service points.